
I made this little basket in a hurry before I went to Kirkwood for the weekend, with a vessel in mind to hold my knitting that had a handle like a bag and firm bottom.
I looked at it last night and realized that someone out there might have found it an interesting project too, so here it is, with complimentary instructions. Or you can download it as a pdf.
Crocheted Acorn Basket
Materials:
- 1 6” diameter slatted basket
- 1 Skein Ecolution 12 Strand Fine Rainbow Hemp Beading Twine (66 yards)
- 5 mm crochet hook
- 1 pair purchased handles
- 1 darning needle
- small saw
- Lining fabric (optional)
Note: These are the materials I used to make my basket. The amount of yarn you use will depend on the size and shape of the basket you have.
Step 1: Buy Basket
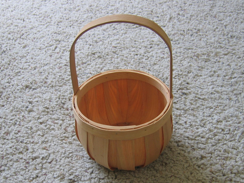 I got this little guy from JoAnns for a couple of bucks. It’s maybe 6” across. I hacked off the handle with a little saw.
Step 2: Thread Base Yarn
 I picked a ball of aran weight hemp yarn that I had lying around and fed it through the slats using a darning needle. Don’t pull the yarn too tight because you’ll need to be able to get a crochet hook under that easily. Tie off the starting end of your yarn loosely. Later, after you’ve crocheted a few rows, you can untie that knot and tug that base yarn tighter.
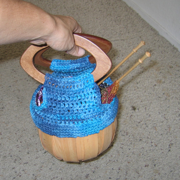
Step 3: Grab a Crochet Hook
 Grab a crochet hook. I used 5 mm. Chain 1 around that base yarn, and put a row of single crochet all the way around, squeezing as many single crochets into the base yarn around each slot as you feel works (I used 8 - your basket size will probably be different) and then reaching around to the base yarn around the next slot to continue.
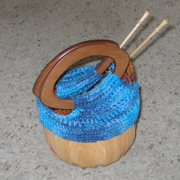
Step 4: Crochet Away
 Crochet around in a spiral, working even until you clear the lip of your basket. On the next round, decrease a few stitches evenly around (say by 20%) so that your crochet hugs your basket lip nice and tight. Go on working even for as long as you like. When you’re ready to make handles, stop working in the round and turn your work, working back and forth. My handles were 22 stitches wide. If you want them nicely tapered, crochet two together at the beginning and end of each row for the first three rows or so. Make a nice flap and stop when it suits you and do the other side. When you’re done, make a round of slip stitch all the way around the edge of your work to finish it off nicely. Then fold a bit of the handle flap around the handles you bought and stitch it in place.
Step 5: Optional Lining
 Because I intended this basket to store yarn-related projects, I chose to lining it with something silky to keep the rough basket innards from abusing my knitting.
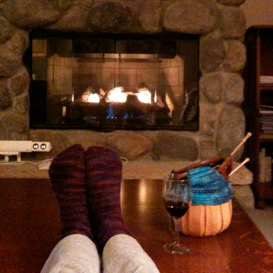
And there you have it. I made a basket. 2 points.
Comments
RE: the last-line comment in
RE: the last-line comment in the pdf:
Nah! THIS one's a 3-pointer!!!